Acrylic yarn is a staple in most knitters’ yarn stash because it is affordable, easily accessible and great for a wide variety of projects. Some professionals even prefer it to cotton yarn. Blocking acrylic yarn is dreaded by both novice and experienced knitters. Everyone has a different opinion about the procedure. Some say you should block, others are against it. The fact is, acrylic yarn can be blocked and should always be blocked depending on the project. Don’t listen to all the nay sayers who claim that acrylic yarn should never be blocked because it kills the fibers or it’s unnecessary.
Acrylic yarn is blocked in a different way than natural fibers and wool Trusted Source Yarn Blocking Tips for Knitters - The Hows & Whys of Blocking There are three commonly used methods of garment blocking. Learn how to execute wet, cold and steam blocking properly for beautiful knitting results today. www.handknitting.com . Heating is the best method, whether the piece is crochet or knit. The heat renders the fibers susceptive to straightening out. You can use a hair dryer or do steam blocking to achieve great results. Let’s take a closer look on how to block acrylic yarn without messing up your project.
Wet blocking is one of the best methods of blocking acrylics. It is usually preferred for animal fibers like alpaca, wool, mohair, and cashmere. With wet blocking, the fabric is soaked in water for a short while before getting transferred to blocking mats.
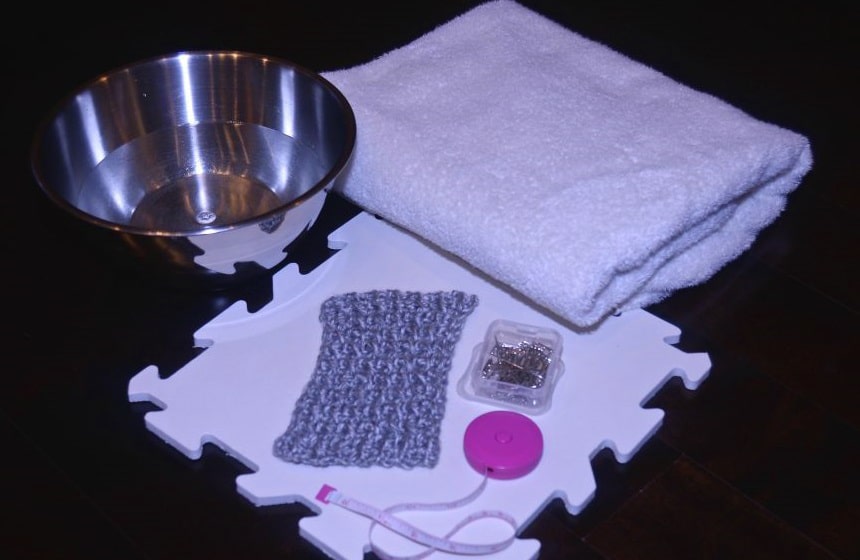
The materials you will need for the procedure include;
Soak your project- Look for a bowl or tub and fill it up with water. You can use the common plastic tubs used for dishes or laundry or even a clean sink. Leave some room in the tub for the garment to fit without spilling water.
If you have wool wash, add it to the water. It will cleanse and soften the garment gently. If you don’t have wool wash you can skip it. Water is the most crucial part of the entire process.
Next, fold the garment into a small piece then place it in the water and press it down until it is completely submerged. You will know it is completely submerged when air bubbles stop coming to the surface. Allow the garment to soak up for at least 20 minutes.
Prepare the blocking mat- You can prepare your blocking mat while the fabric is soaking. Begin by referring to your pattern for the finished dimensions of your project. Take note of the measurements of the garment from the bottom to the top, its bottom width and the width of its body.
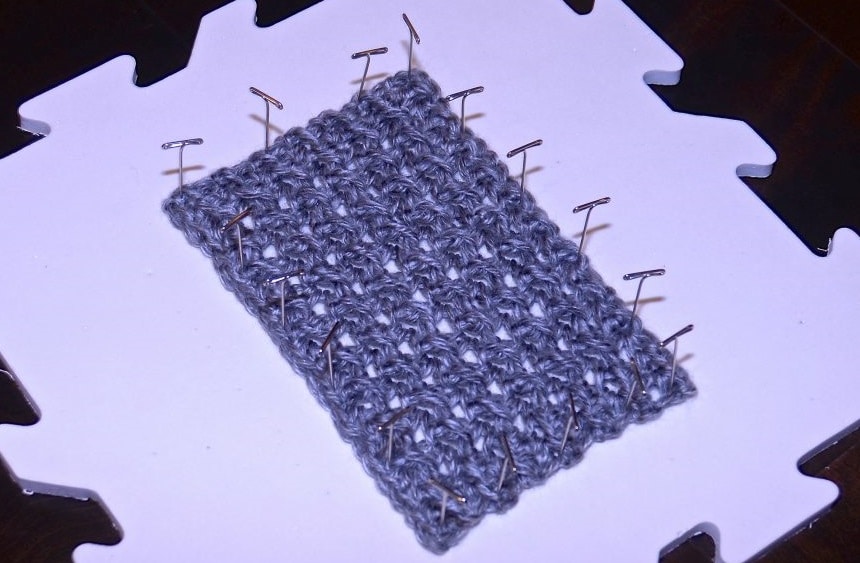
Use a measuring tape to establish the exact dimensions of the garment on the blocking mat. Place pins as markers and when you are done double check that the dimensions are exactly the same as that of your project. If you have no idea what pins to use, check out the popular Gem office T-pins. They are incredibly affordable and are made to last with high-quality steel and nickel finish. The pins come in a box of 100 giving you excellent value for your money.
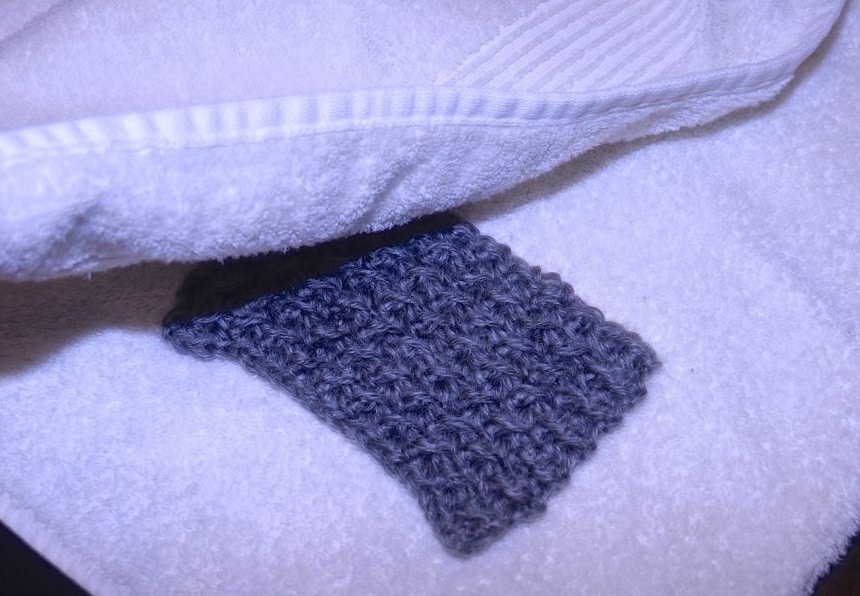
Squeeze out excess water- When the 20 minutes soaking time lapses, grab a dry towel and place it on the blocking mat you just prepared. Pick up the soaked garment from the tub gently. It will be heavy but you have to be extra keen not to stretch the fabric. Squeeze out the excess water before transferring it to the towel on the blocking mat. Avoid wringing or twisting the garment as you may agitate the fibers and get bad results.
Unfold the fabric then start rolling the towel from the bottom. When the garment is completely rolled in the towel, press on it and squeeze out the excess water. When satisfied that enough water has been squeezed out, transfer the garment to the blocking mat.
Shape your garment/project- Once on the blocking mat, use your hands to align your project with the pins you had placed on the mat. Ensure the edges are straight and the top and bottom pieces of the project are together.
Allow your project to dry- This is the part that takes the longest time. Your patience will be tested. Let the project dry for 24 hours. You can block in the morning or afternoon and let it dry overnight. Do not move the garment until it is completely dry. One of the main advantages of wet blocking is that it dries faster than other methods like steam blocking.
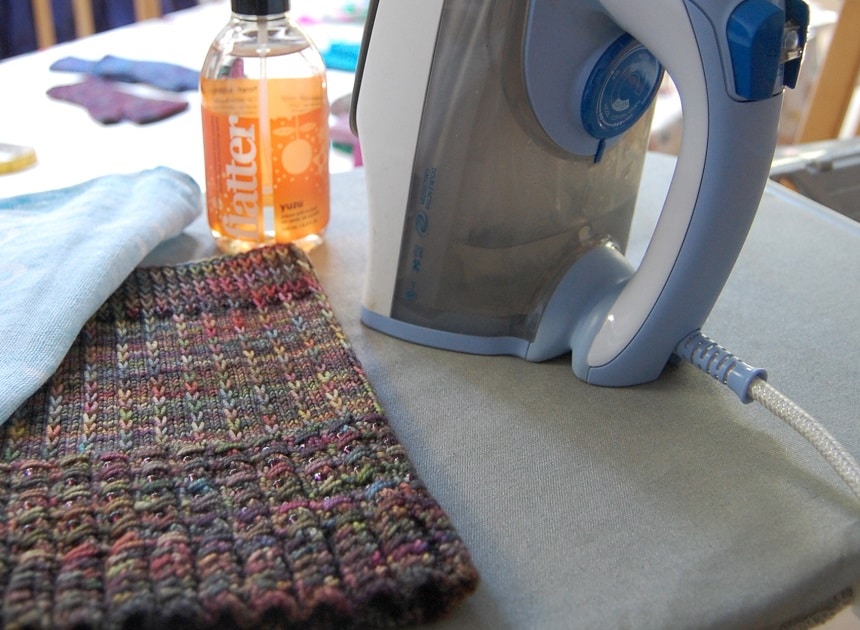
This is another popular method of blocking. It can be done with a garment steamer or an iron on the steam setting. You will need an iron with a steam setting, a towel or blocking board, and pins for the process.
The CHI steam iron is one of the most acclaimed irons with a steam setting out there. It is a popular choice among sewists as the best iron for sewing. It provides powerful steam for effortless ironing through over 400 steam holes. The iron is built to last with premium materials. Its matte chrome accents give it an attractive and polished modern look.
Here is a step by step guide on how to steam block acrylic yarn;
Lay your project on a towel or blocking board. You don’t have to pin it down, especially if it is made with heavy yarn. If it is a lacy acrylic yarn crochet project then you definitely need to pin it down. Lace needs to be stretched drastically and only pinning can help you achieve that correctly. If you are wondering how to block lacy acrylic yarn crochet projects without messing them up, this is the ultimate procedure, except you have to pin your projects on the blocking mat.
Prepare your iron and fill it up with water. Set it to the steam setting then leave it to heat up.
Once the iron is hot enough, lift it and hover it over your project. Do not make the mistake of touching the iron to the crochet or knitted project. The acrylic yarn will melt instantly. Hover it at least an inch above the project. You can get closer than that if you want but you have to be careful enough to prevent the iron from touching the project physically. The steady stream of steam heats up the little synthetic fibers of the acrylic. They relax so you can manipulate them into any shape you like.
Also, during steaming, you can gently adjust the fabric to smooth out any bumps. This might not be very easy if you are working on a large project. Just be careful not to push or rub the fabric as you can stretch out your stitches where you don’t want them stretched.
When you are hovering the iron over the knitting/project remember not to stay at one place for too long. You may risk your project as well as burn yourself. If your project has detailed patterns and difficult areas, you can always come back in a few minutes to re-steam and stretch.
Keep hovering the iron on top of your project until it is completely damp. You will also notice that it has softened up a bit. Let the project cool down and dry completely before unpinning it if you had pinned it. If you had not pinned it, you are all set.
Steam blocking is a top preference for many because it softens scratchy yarn and adds a wonderful drape to it. When you successfully steam block acrylic yarn or a project with lacy acrylic yarn, you will notice the gaps in the lace pattern are much more relaxed and further apart. The garment/project will also increase in size at least by 25%.
It also happens to be one of the most dreaded blocking methods because you can easily over steam or overheat or even touch the surface of your project with the iron and end up melting it.
Actually, it’s one of the worst mistakes you can make with your project. It ends in tears and frustration as the acrylic fibers stick on the iron’s plating and your stitches are warped into something unrecognizable. The damage is irreversible, unless you can frog the project and re-knit the parts that have been destroyed.
If you are too concerned about touching your project with the iron, you can invest in a protective mesh cloth for ironing. Trusted Source Protective Mesh Cloth For Ironing - Delicate Clothes price from jumia in Nigeria - Yaoota! Protective Mesh Cloth For Ironing – Delicate Clothes price from jumia in Nigeria. Compare prices and shop online now. yaoota.com It comes in handy, especially if your project has a lace pattern or is under DK weight.
Spray blocking is the simplest of all the blocking methods. All you need for the process is a blocking mat, pins, a measuring tape, a spray bottle and water. If you can afford a blocking mat, you can use an ironing board with a towel. A blocking mat is more convenient though, especially if you have to pin down your project.
Knitters, sewers and experts swear by the KnitIQ Blocking Mats. The mats have clear grid lines that allow you to align your project well for an accurate and professional finish. Made with thick dense foam, the mat is durable yet lightweight. You can trust it to last you for years to come regardless of the number of times you push pins deep into it.
Here is a step by step guide on how to block knitting acrylic using the spray method;
Pin your project to the blocking mat- For the best results, use pins to stretch out your project on the blocking mat. Pin the corners out to a point.
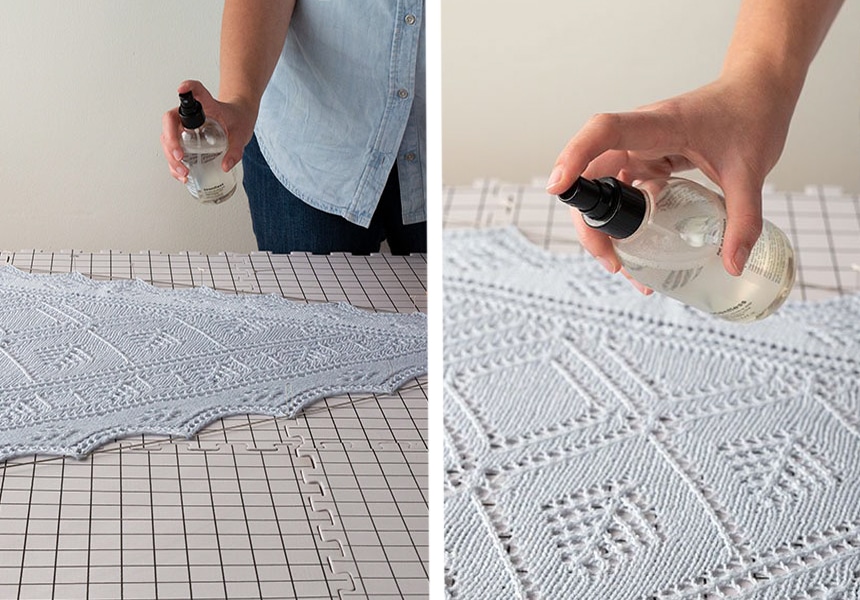
Fill your spray bottle with water. You can use normal tap water. Spray your pinned project continuously until it is completely saturated.
Wait for the project to dry. Spray blocking takes the longest to dry because you don’t get the chance to squeeze out excess water. Once it is dry, unpin the project from the blocking mat. It should be much softer and drapy than the scratchy acrylic you started off with.
Spray blocking is the best blocking method for large projects. Wet blocking or steam blocking a large project can be tedious and time consuming.
Blocking acrylic is one of the most intimidating procedures for knitters and sewists. Learning how to block acrylic yarn is crucial if you want your home-made projects to look like professional finishes. Once you learn the tricks, you will breeze through the process with every project. You should know when to use either of the 3 blocking methods; wet, spray and steam blocking to get the best results.
Wet and spray blocking are the best for blocking a project that you want to manipulate to a specified shape or dimensions. Steam blocking is perfect for softening a project and adding some drape to it. If you feel your projects is too firm and scratchy you steam block. Also, spray blocking is the best method if you are working on large projects. Small projects are easier to toss in a bowl for traditional wet blocking.