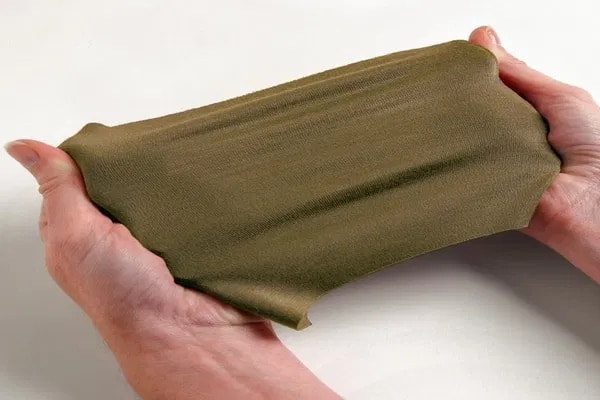
When thinking about the various clothing you wear on a daily basis, it is completely normal to overlook the functionality of some less obvious parts of the clothing. You most definitely have noticed buttons on a jacket or on your favorite pair of jeans but do you notice the fine details associated with buttonholes? If not, don’t stress as there is a detail that is quite often overlooked.
The history behind buttonholes is quite interesting. According to Wikipedia, buttonholes have been used for fastening clothing since the 13th century in Germany. It goes without saying that many things have changed since those early days in Europe. The experiences that many garment makers have had over time have made our work in the modern-day more knowledgeable and give us ideas and solutions to some of the garment issues that may have occurred in the past. With that said, there are times where you will want to work with found buttonholes. In this article, we will identify the best ways to do so in the most effective way.
 First of all, let’s stop to identify what the bound
buttonhole
Trusted Source
Buttonhole - Wikipedia
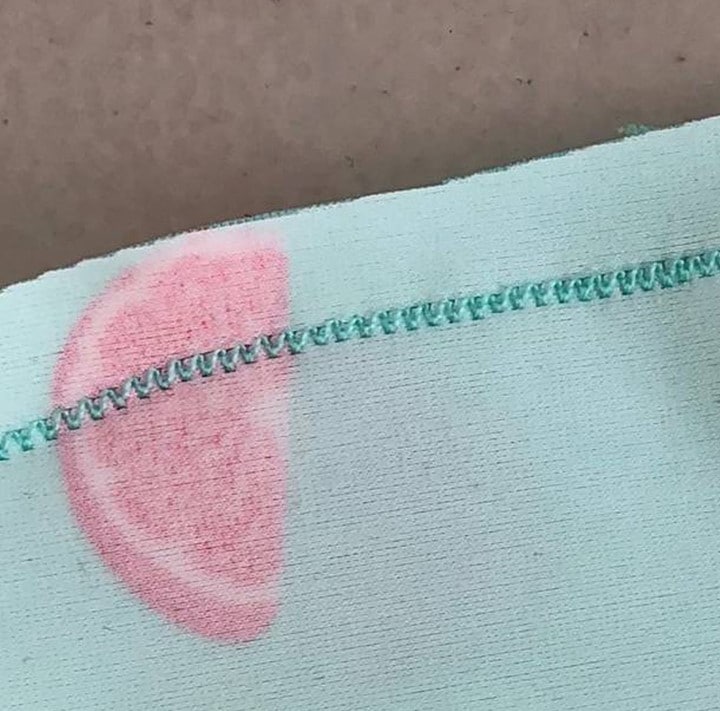
Buttonholes are reinforced holes in fabric that buttons pass through, allowing one piece of fabric to be secured to another. The raw edges of a buttonhole are usually finished with stitching. This may be done either by hand or by a sewing machine.
en.wikipedia.org
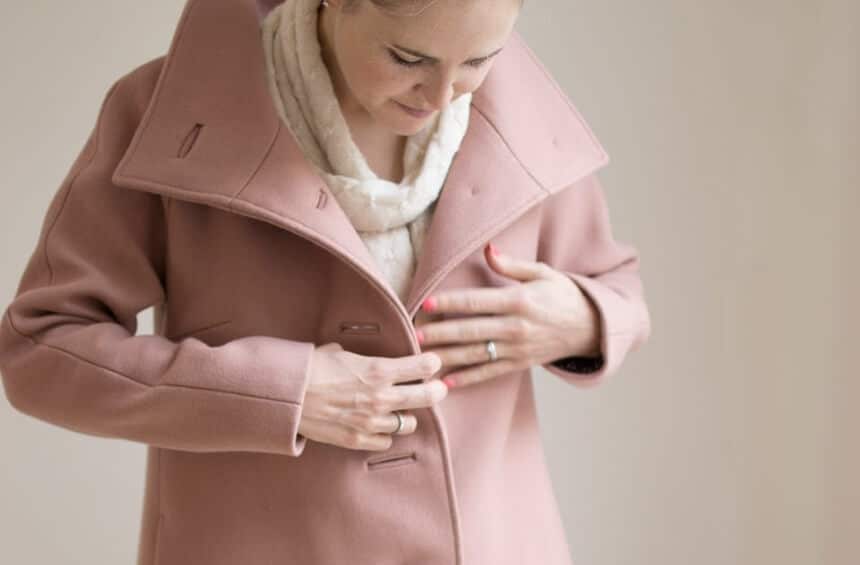
really is. Abound buttonhole is an alternative to the machine buttonholes. These can often be seen in various coats. For example, if you’re wearing a trench coat with bound buttonholes, you will notice on one side of the carpet are a set of buttons, and the other side has a set of holes. When you engage these two sets of items, it will secure the garment to be closed.
First of all, let’s stop to identify what the bound
buttonhole
Trusted Source
Buttonhole - Wikipedia
Buttonholes are reinforced holes in fabric that buttons pass through, allowing one piece of fabric to be secured to another. The raw edges of a buttonhole are usually finished with stitching. This may be done either by hand or by a sewing machine.
en.wikipedia.org
really is. Abound buttonhole is an alternative to the machine buttonholes. These can often be seen in various coats. For example, if you’re wearing a trench coat with bound buttonholes, you will notice on one side of the carpet are a set of buttons, and the other side has a set of holes. When you engage these two sets of items, it will secure the garment to be closed.
Sounds simple, huh? The reality is that the actual creation of that relationship requires close attention to detail and a plan that accounts for various factors. Let’s discuss how to create bound buttonholes in the most effective fashion.
As with many Other things in the creating garment space, we have to account for a number of things. We will have to identify our materials and our tools or instruments to best allow us to accomplish our task.
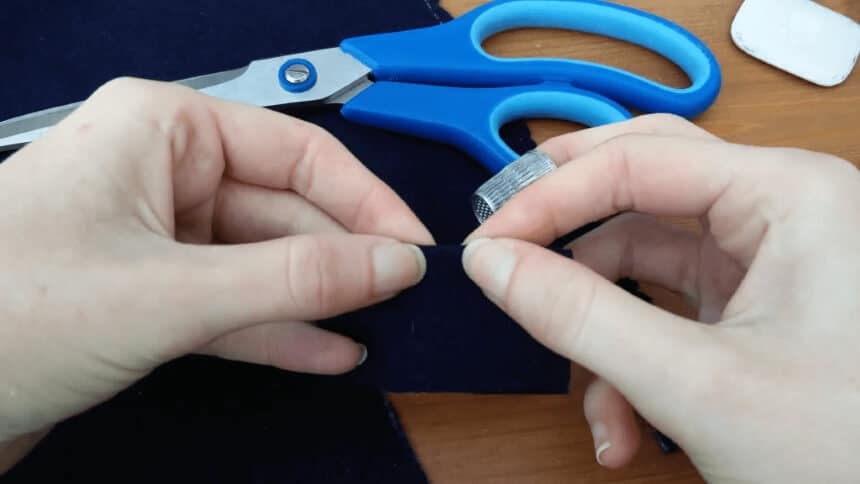
 When identifying the tools or instruments that you will be using throughout the process, you have to decide which of these are necessary and which are optional. We will discuss all the options available for you, but please keep in mind that the decision will ultimately be yours. When thinking about optional tools, please consider that the reason they are recommended is that they can simplify the task and expedite it as well. The first instrument you cannot do without is a sewing kit. There are many great sewing kits out in the market, or rely on your old handy dandy sewing kit.
As we are well aware, the advent of technology has simplified and made completing tasks and projects in a quicker fashion. This, too, has been made available in the sewing world via sewing machines, according to various reviews, one of the best sewing machine options available in the Swiss Design Computerized Sewing Machine by Bernette. Another tool that has been made more efficient due to the use of technology is the self-threading serger. If you have ever spent time sewing, you recognize how valuable all these tools are with efficiency and time.
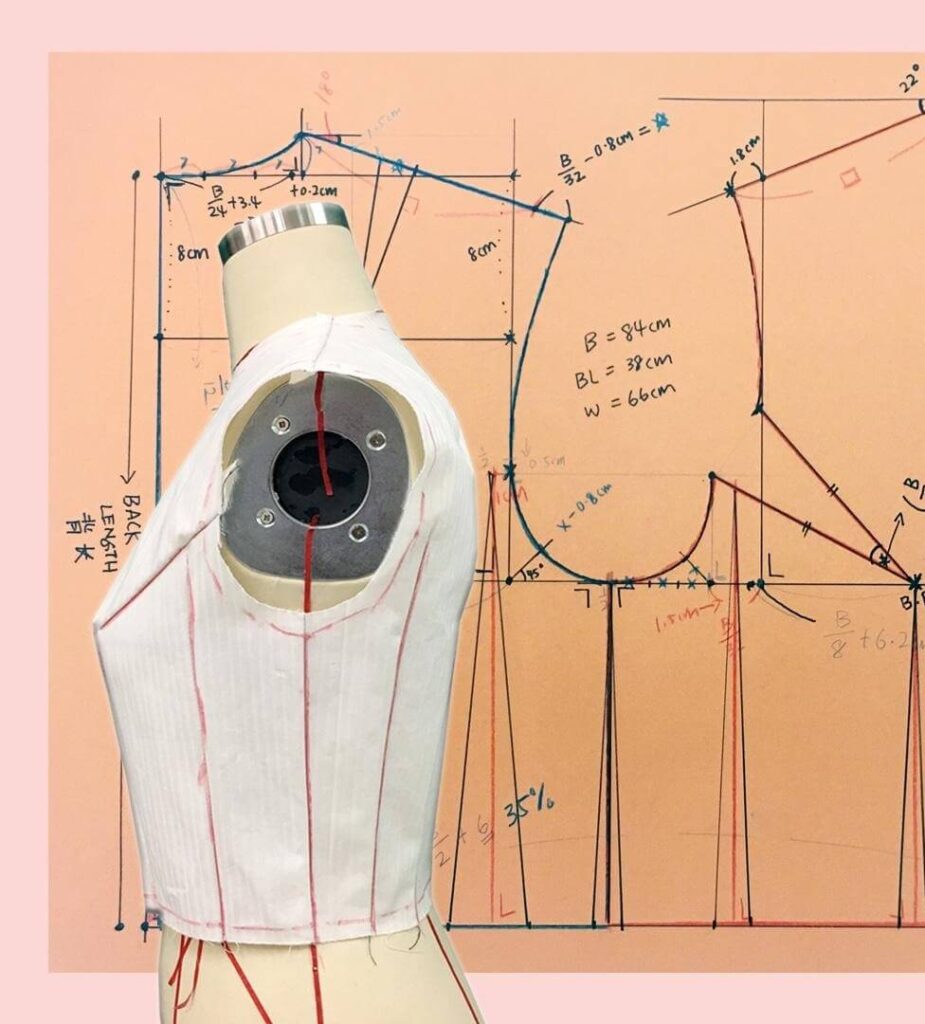
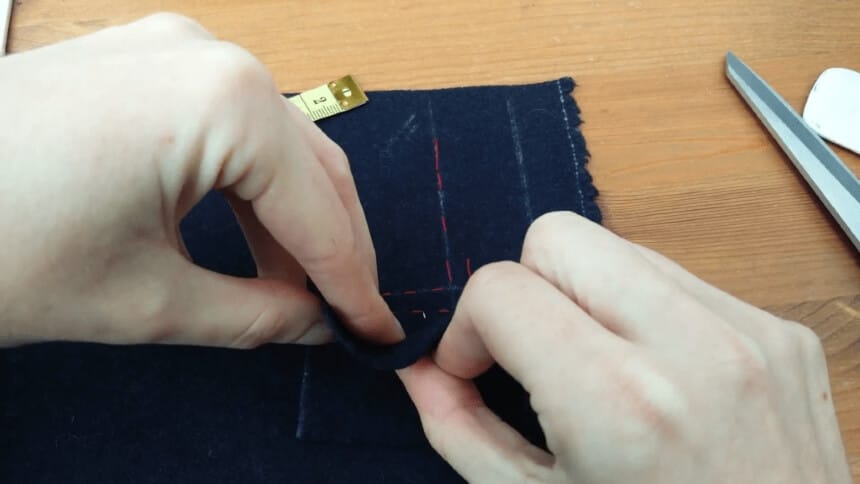
 As you look to begin your bound buttonhole project, you must stop to account for a few preparations. Please keep in mind that these initial steps will ensure that the process runs smoothly and effectively. The first thing we need to figure out is how wide we want the buttonhole to be. Ensure that you add the depth of the number so it can fit through the buttonhole. Prior to sewing the garment, we create the buttonhole pattern.
If you decide to use a paper pattern, ensure that it is marked on the piece itself. Once that is identified, mark the center edge of the button in between the center front and the edge of the coat itself. It is at this point that you will draw the opening of the buttonhole. Remember, add additional space to that of the button is that you want it to traverse all the way through the opening.
Now you are ready to draw the vertical line which identifies the edge of the buttonhole. It is now time to draw the final height of the buttonhole. The type of fabric will make a difference as to how you approach this. For example, when using a heavier fabric, you will want the buttonhole to be wide enough to accommodate the button’s width and a little more.
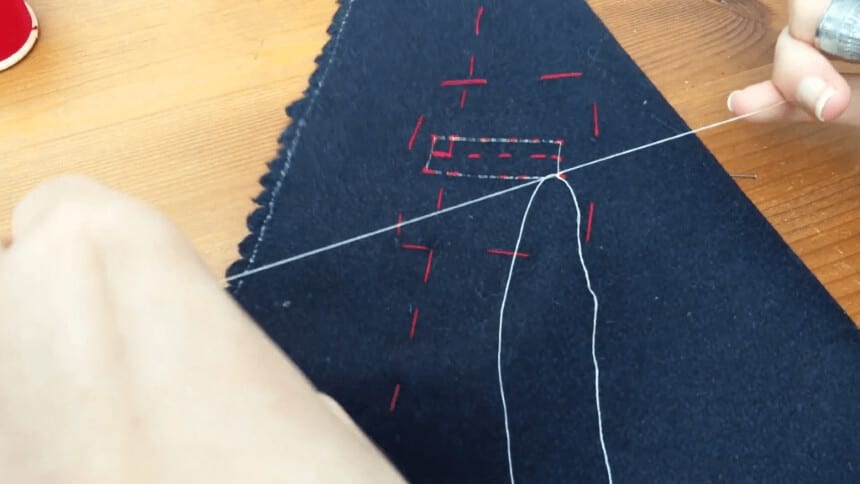
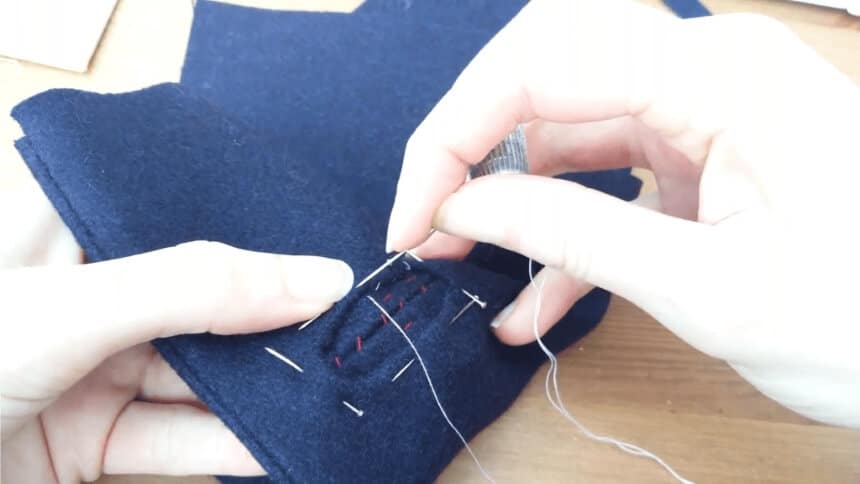
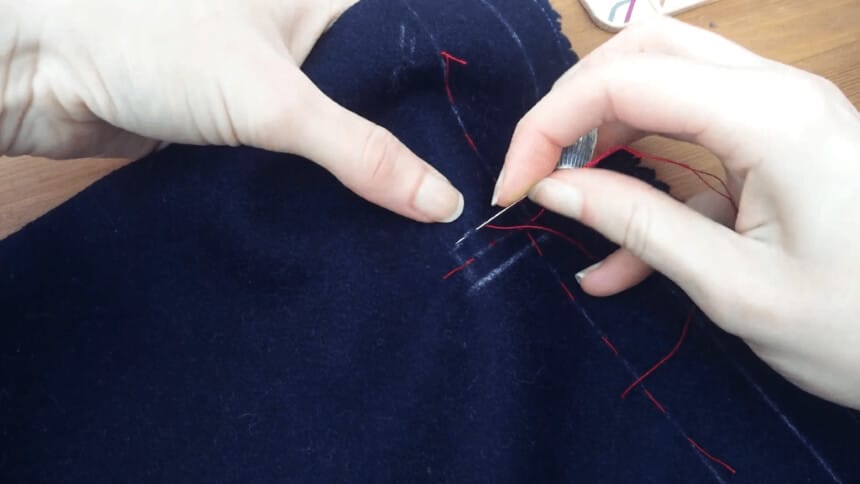 As you’re working on your bond buttonholes, it is really important that you take steps to keep the material from shifting on you. It is this reason to tack in the chalk lines. Many garments makers rush through this step or skip it altogether. That is a big mistake. Take the time to do this correctly the first time, so you don’t encounter issues later on in the process. It is best to use a different colored thread to differentiate from the fabric itself.
 When identifying the welts for the fabric, you need to have it be as wide as the buttonhole plus five times the width of the buttonhole. Allow a little extra as well for the seam to fit in nicely. There is nothing worse than taking the time to design a garment and then arrive at a point where you realize not enough room was left for the buttonhole to fit in the crevice and latch on.
 It is time to center over the buttonhole. Once you have done that, mark the edges of where it will go and use a pin to set a marker to identify the centerline of the buttonhole. It is not time to pin and tack this particular patch in place.
 Now the fun begins! It is time to start sewing. Gather your buttonhole and put it in place so it can be stitched carefully. As you begin sewing, do not reverse at any point. Just leave a long piece of thread. When you get to the corner, it is time to slow down and proceed with care along with the buttonhole. Pivot your corners as needed back to where you started. Another reminder to not go in reverse at any time.
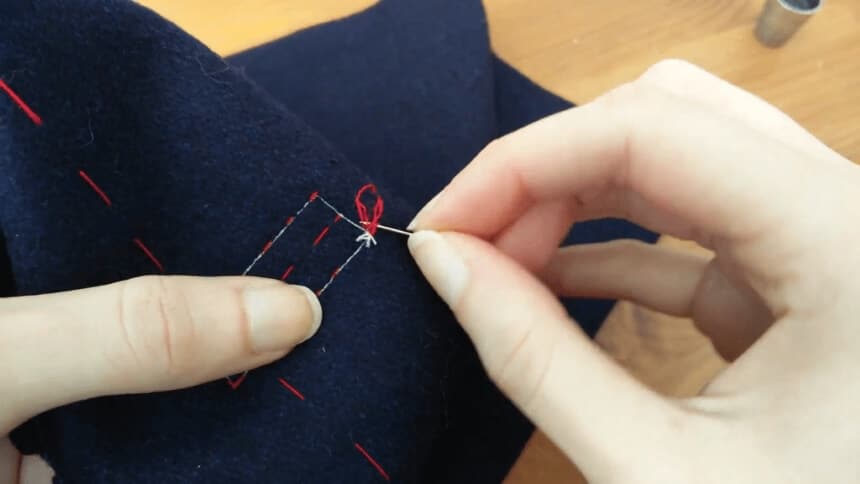
 Now we have to identify the threads and do something with them. Once you have them in your grips, pull the top of the threads until a small loop appears. At this point, pull the loop and tie them tightly in a knotted fashion. It is now time to trim the threads down. Taking all of these steps is necessary, so the garment does not give an incomplete and messy look. When putting forth all of these efforts to get to this place, it is worth your time to address these areas as well.
 It is now time to remove the tacking. Please leave the marking on the center front and the center buttonhole while removing the remaining tacked lines. You need to do this very carefully, and you might want to consider using a pin, although tweezers could work as well.
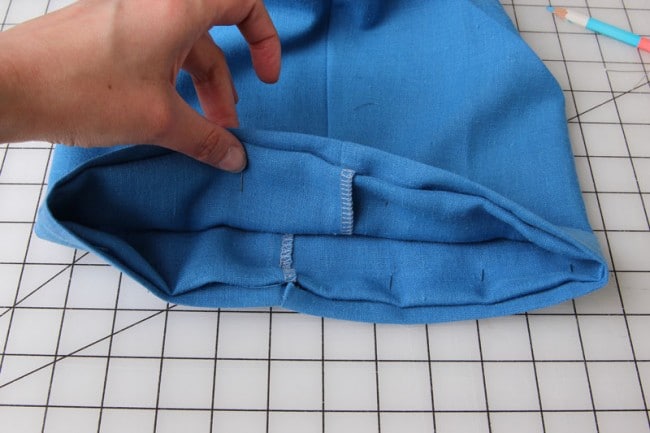
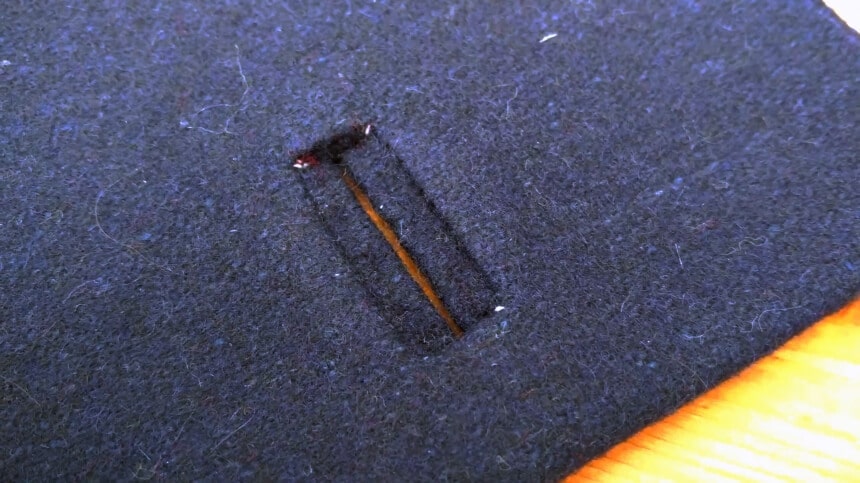
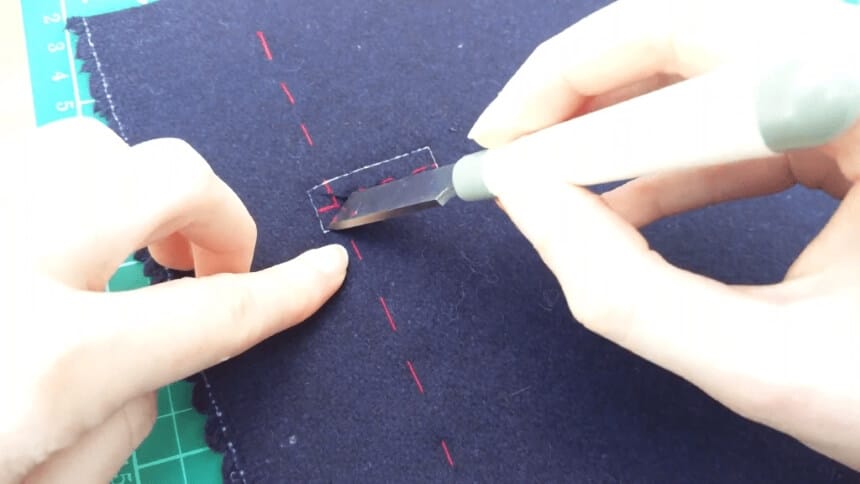 Now that the tacking is out, you will now move to cut open the buttonhole itself. This is an exciting time so make sure you have complete control of your nerves while doing it as it has to cut through various layers in the process. Please make sure you do not cut through the stitching, as rectifying the issue will be extremely difficult.
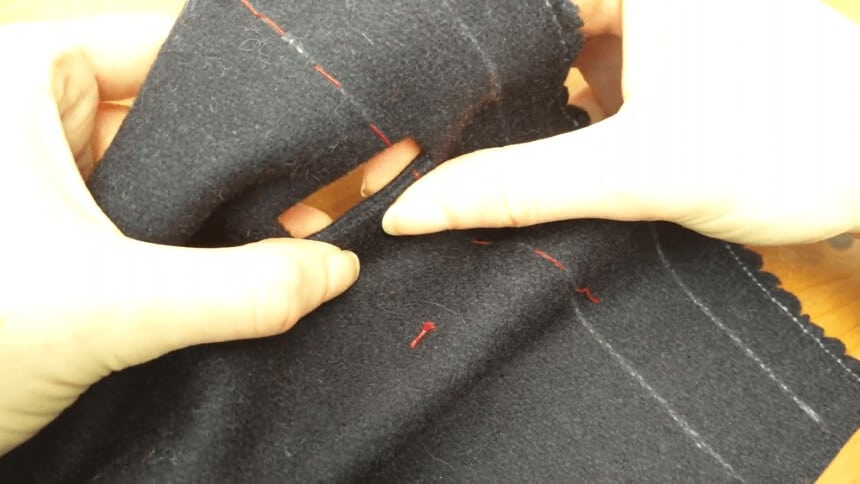 We are now at the point where we have to push the patch through the opening from the correct side to the wrong side. The best way to do this is by using your fingers along the stitch lines so you can create a nice edge to the buttonhole. Using your fingers to roll along the seam will assist in creating the fold that you seek. Once the fold is to your liking, then take the garment to the ironing board to give it one good press.
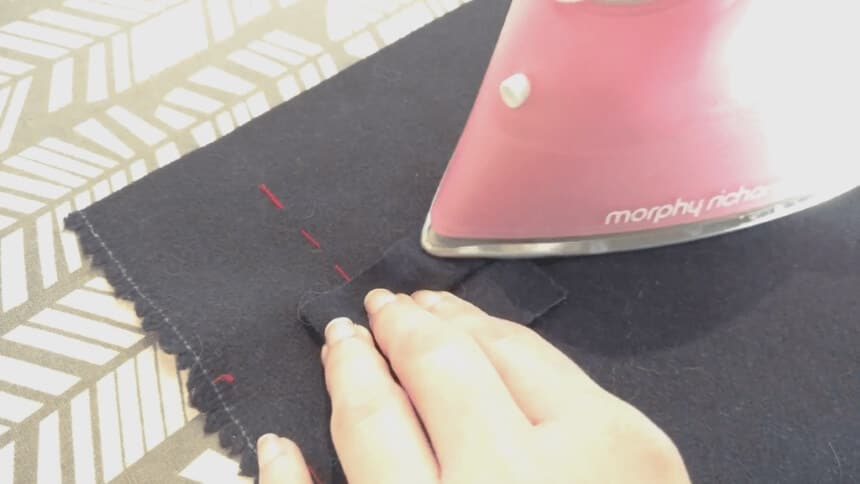 Now we are going to take the step to work with the fabric of the patch from the wrong side to create the welts by folding it back onto itself in the center of the buttonhole. These particular steps can be somewhat frustrating, but you need to ensure that the welts are even and straight. When you have reached the place where you are happy with the look, then take it over to the iron and press it in place. Take a look at the buttonhole and see what it looks like from the right side. At this point, if we can establish that they are even, we can iron press the area with a little steam to go along with the press. Lastly, play some tracks on the welts to keep them in place for the meantime.
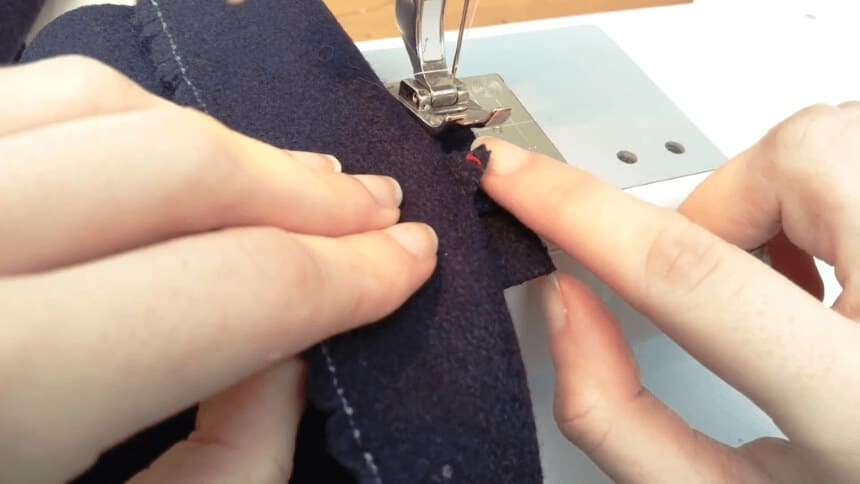 Considering all the steps that have been taken to get to this point, you are now ready to sew your work into place. You begin by having your buttonhole right side up and then moving the fabric over the garment to reveal the small triangle and the folded fabric of the welt itself. Now we begin stitching down the little triangle to the fabric. Move your way forward and backward to keep the triangle in place. Repeat as necessary to ensure the triangle does not move.
Rotate the buttonhole and place the fabric along the edge of the buttonhole. Attempt to stitch very close to the previous line of stitching via the layer of the seam allowance. Make sure you do this for the long edge as well. Now it is time to trim down any excess seam around the edges of the patch. It is now time to work on the rest of the coat.
 You might be thinking that we are done with the buttonhole, but we also have to account for the inside of the coat in the lining associated with it. We need to create small slit pieces to exactly match the button home. The simplest way to do this is to attach the face and press it from inside the garment. You may want to mark the buttonholes on the wrong side by poking pins through the corners of the buttonhole. This will allow you to close up the area in a way that gives the welts the necessary firm pressing. Once you complete the various steps, your bound buttonhole is complete.
 Now it is time to admire your work. What you have created took many steps and demonstrated your garment-making mastery. Fortunately, creating a bound buttonhole will state to the world that the person responsible for creating it showed careful attention to the matter and was fluid in the process.
As you may have noticed, there is a lot of careful work to make the bound buttonholes you desire. There are many instruments that you will use in the process to make your creation come to life. The one instrument that is essential is that of the sewing kit. According to various reviews, one of the best sewing kits currently on the market is the Premium DIY Sewing Supplies Kit by Perskii. One of these kits can make a difference in you having a positive or negative experience.
When taking on the various projects when creating garments, creating your own bound buttonholes is one of the experiences that gives you the feeling of true accomplishment. Aside from finalizing such a project, you will be able to revel in the pride that goes with showing off your work. Once you have succeeded in such a project, you are ready to try your sewing hands at more complicated garment-making experiences.