According to statistics Trusted Source • Share of sewers/craftsmen in the U.S. by age 2018 | Statista Share of Americans sewing or crafting in the last 12 months in 2018, by age. www.statista.com , most of the current American population doesn’t know how to sew. The same is the case in most of the modern world. Notably, sewing was an essential skill in the past. However, few people these days have the time or the patience for such crafts.
That said, some of you may want to try out sewing and embroidery for yourselves, which is where Brother sewing machines come in. The company has a stellar reputation when it comes to making these sewing devices which is why you may have opted to purchase one of their machines.
Nonetheless, before you can use the invention for the first time, you need to learn how to thread a Brother sewing machine. As you’ll no doubt find out, threading one can be a bit complicated. Nevertheless, with the instructions given below, you can definitely hack it.
Before you can even think about threading your Brother sewing machine, you have to wind up the bobbin and fix the spool.
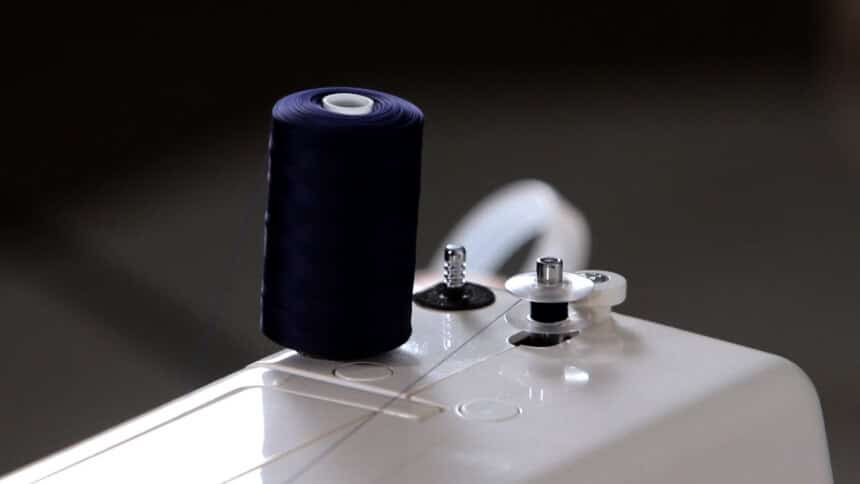 Start by locating the spool pin, which should be on the top part of your machine. In some devices, you may have to pull the spool pin up to reveal its full length. Place your spool on the spool pin. Also, make sure that you position the spool to turn counterclockwise when the machine is pulling on the thread.
Next, pull your thread to the thread guide on the opposite side of the machine. There is also a disc on top of the thread guide that you should wrap the thread around. This time, ensure the thread is moving clockwise as it goes around the disc. After that, pull the thread back to the side of the machine where you left the spool.
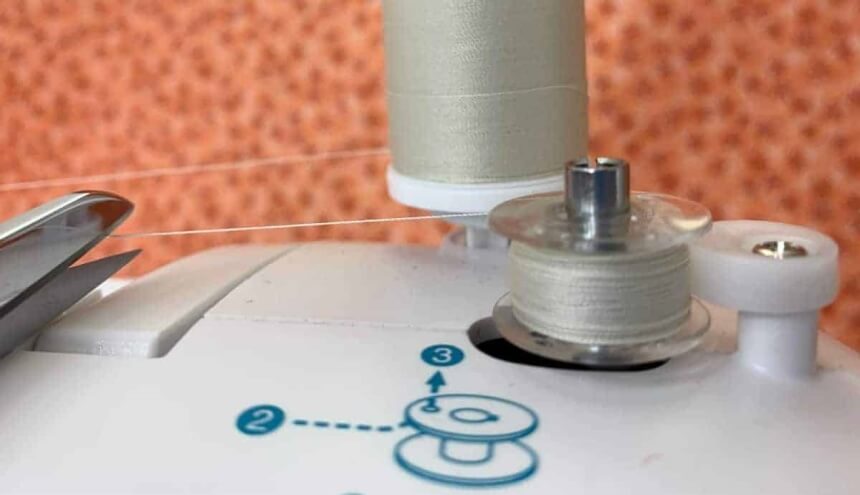 Right next to the spool pin, there should be a winding shaft. This is where you place the bobbin. The bobbin should at least have one hole going through the top. What you want to do is pass your thread through this hole. Notably, the thread should start on the inside of the bobbin and exit through the top.
After that, make sure you pull the thread through this hole until you have about 2 to 3 inches of the yarn hanging out. Slide the winding shaft to the left to lock it in place.
Keep holding onto the end of the string as you press your pedal or foot controller. This should allow the thread to wrap around the bobbin a few times. You can then trim the thread that you’ve been holding on to at the top of the bobbin.
After that you can keep winding the bobbin until you’re satisfied or until the bobbin is full. Once you’re done, lift the bobbin off the winding shaft and cut the thread tying it to the spool. You can then set the bobbin aside as you focus on threading your needle.
Aside from that, you can choose to buy threads like the MILIJIA 50Pcs option. Since it’s made of high-quality polyester and comes with pre-wound bobbins, you may get to skip the steps mentioned above.
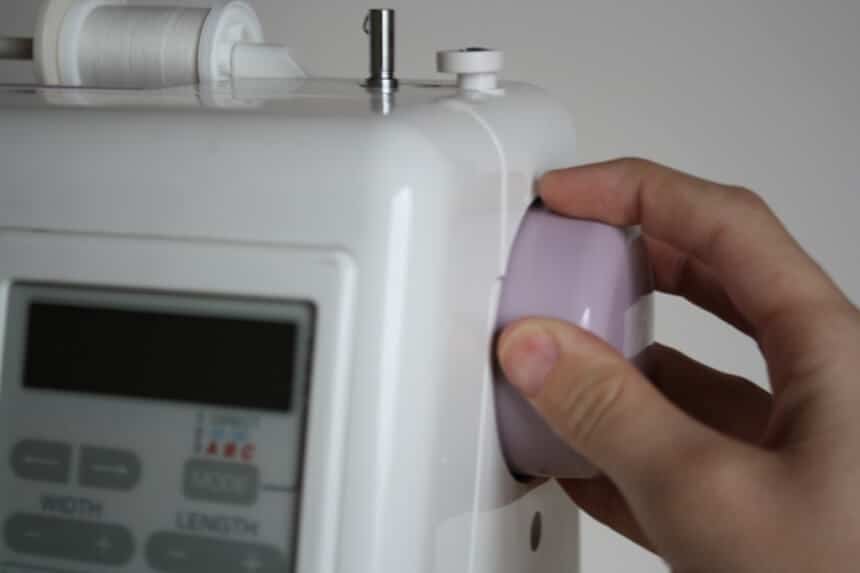
Before starting you again need to place the thread on the spool pin. On the right end of your Brother machine, there should be a balance wheel as well. Turn this balance wheel towards you very slowly. Do note that as you’re doing this, your machine should be off. This will help you avoid injury and damaging the machine.
By turning this wheel, you raise the take-up lever, which should be on the machine’s left side. Also, take this time to raise the presser foot using the dedicated lever.
With the preparation steps done, you follow up by pulling the thread to the guide on the machine’s top-left part. This time you won’t need to wind it around the tension disc. However, you will need to hook the thread to the guide.
Also, on the side of the machine that’s facing you, there should be two grooves or channels that seem to meet just above the needle.
Next, pull the thread down through the groove on the right and up the groove on the left. At the end of this groove is where you’ll find the take-up lever that you will have to thread. The thread should go in on the right side and exit on the left.
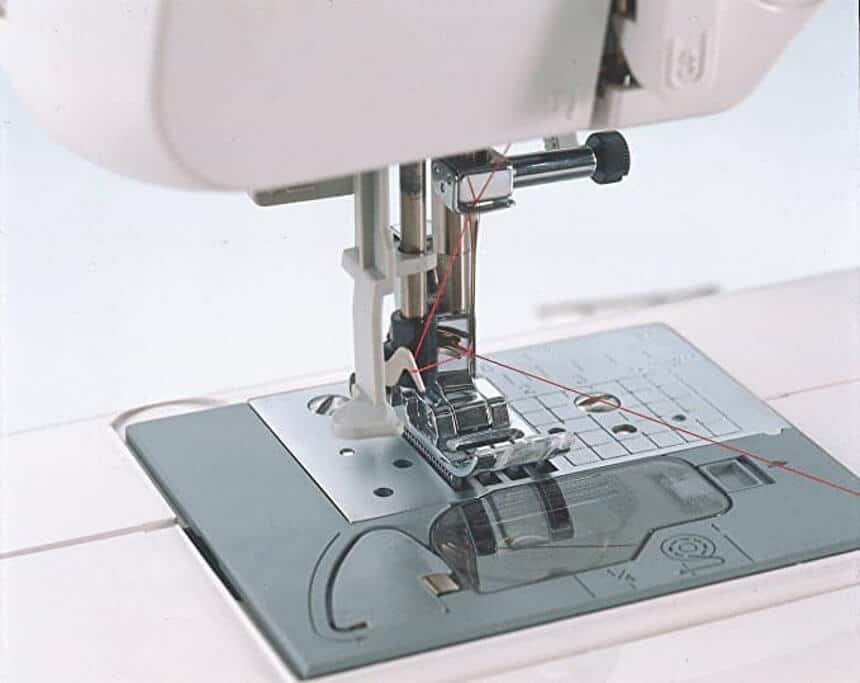 After threading the lever, pull the thread back down through the left-sided groove. Just above the needle, you’ll find another thread guide that you will put your yarn through as well.
Next, you put your thread through the eye of the needle. Notably, some computerized sewing machines like the Brother CS6000i have an automatic needle threader to make this part of the process easier.
After that, pull the thread so that you have at least two inches of the tail end of the thread hanging from the needle. Also, position this part of the thread, so it sits on the back of the machine.
You’ll also need to know how to thread a bobbin on a Brother sewing machine. Here are the steps for the same:
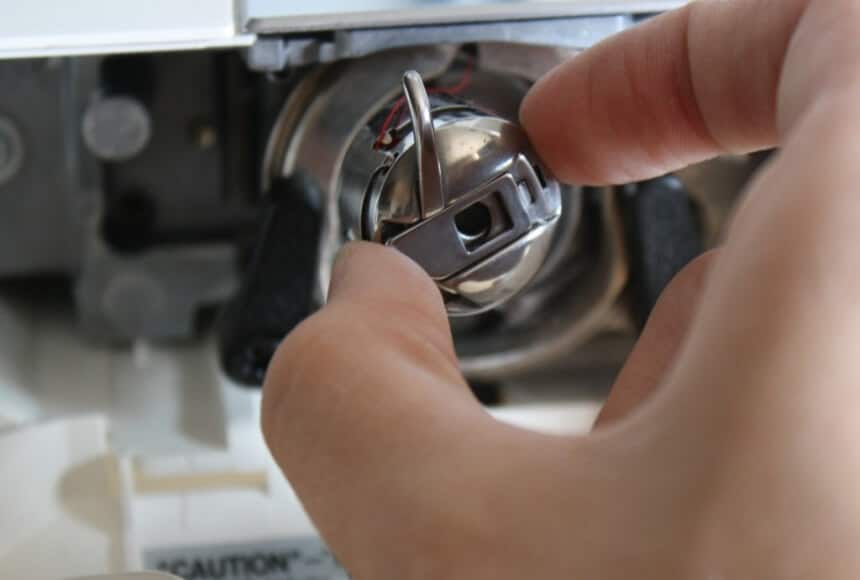 Raise the needle on the machine by turning the balance wheel towards you. You may also need to raise the presser foot. Underneath the needle and on the front side of the machine, there should be a shuttle cover that you should open as well. Inside this shuttle cover, you will find a bobbin case.
You’ll then have to pull the bobbin case latch, and that will allow you to detach the case from the machine.
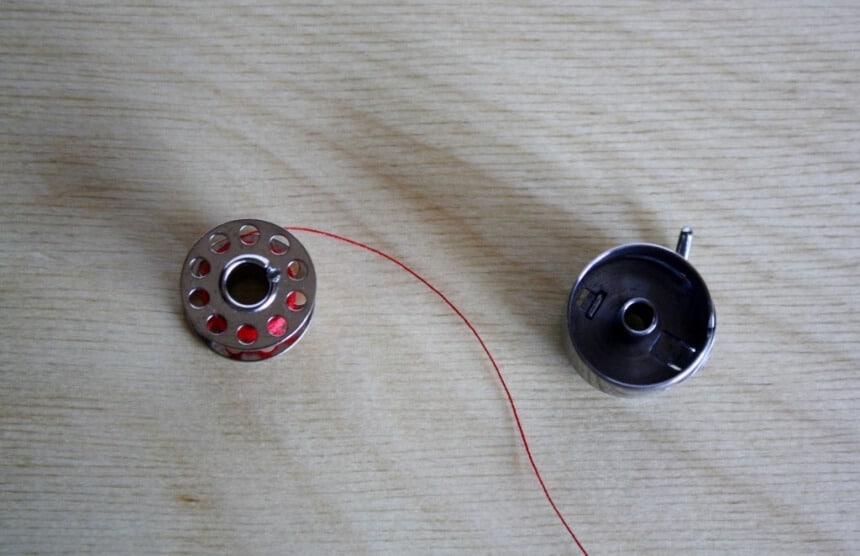 The bobbin you put aside earlier will now go into the case. Remember that if you pull on the thread while it is in the bobbin case, the bobbin should rotate clockwise. We also recommend that you pull on the thread and allow the tail end to be at least four inches long.
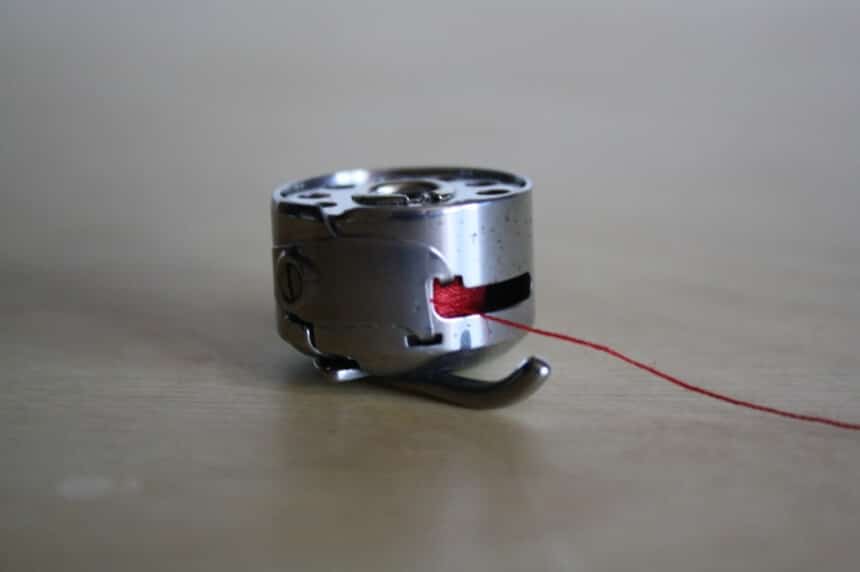 With the tail end hanging out of the bobbin, pull the thread into the groove on the bobbin case. Slide the thread along this groove until it is in the thread guide hole. This should be under the spring clip of the bobbin case.
 After that, replace the bobbin case by holding the latch as you put it back in place. If you do this right, the bobbin case should not move while it is in this position. Remember to replace your shuttle cover as well.
 You again go back to your balance wheel and turn it counterclockwise while you hold the part of the thread that you threaded through the eye of the needle. The needle should dip into the machine, catch the thread from the bobbin and come back up as you do this.
Consequently, there should be a loop right under the needle that you can catch with your fingers and pull up. This will free up the tail end of the thread that was in the bobbin.
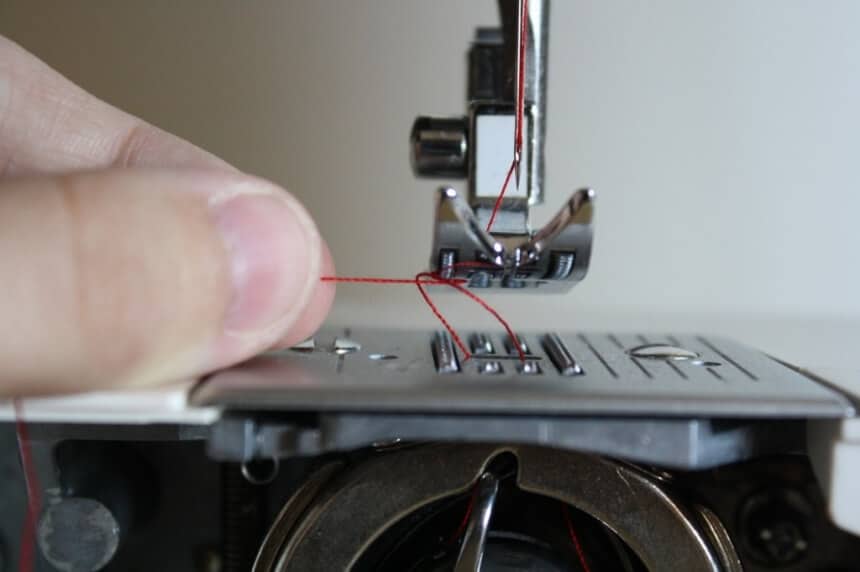 Pull both of these threads until you have a minimum of six inches on each tail. Also, position these threads behind the presser foot of the machine. Remember that the upper thread should pass between the toes of the presser foot as it goes to the back of the machine.
After that, you are set to go and can then start your sewing project.
If you’ve gotten to this section, you should know how to thread a Brother xl2600i sewing machine or any other offering in the manufacturer’s line-up by now. Also, despite the many steps outlined above, it is a process that should take you longer than two minutes once you’re used to it.
You can now enjoy making full use of your new Brother sewing machine without a care in the world.